Grafana高可用集群安装配置
官方文档:https://grafana.com/docs/grafana/latest/administration/set-up-for-high-availability/
1、添加Grafana社区版对应的Yum源
vi etc/yum.repos.d/grafana.repo

[grafana]
name=grafana
baseurl=https://packages.grafana.com/oss/rpm
repo_gpgcheck=1
enabled=1
gpgcheck=1
gpgkey=https://packages.grafana.com/gpg.key
sslverify=1
sslcacert=/etc/pki/tls/certs/ca-bundle.crt
2、安装Grafana
yum install grafana3、启动Grafana
systemctl daemon-reload
systemctl start grafana-server
systemctl status grafana-server

# 设置自启动
systemctl enable grafana-server
4、创建mysql数据库,用于保存集群配置
mysql -uroot -p

# 创建grafana数据库
create database grafana;

# xxxxxxxx 表示数据库密码,授权相应的IP地址及hostname访问数据库
grant all on grafana.* to 'grafana'@'10.255.200.%' identified by 'xxxxxxxx';
grant all on grafana.* to 'grafana'@'localhost' identified by 'xxxxxxxx';
grant all on grafana.* to 'grafana'@'devops01' identified by 'xxxxxxxx';
grant all on grafana.* to 'grafana'@'devops02' identified by 'xxxxxxxx';
grant all on grafana.* to 'grafana'@'devops03' identified by 'xxxxxxxx';

# 保存权限
flush privileges;
5、修改Grafana配置,使用mysql数据库
vi /etc/grafana/grafana.ini

#################################### Database ####################################
[database]
# You can configure the database connection by specifying type, host, name, user and password
# as separate properties or as on string using the url properties.

# Either "mysql", "postgres" or "sqlite3", it's your choice
type = mysql
host = 10.255.200.1:3306
name = grafana
user = grafana
# If the password contains # or ; you have to wrap it with triple quotes. Ex """#password;"""
password = xxxxxxxx
6、修改默认端口为3001,将默认端口3000配置为tengine监听端口,禁用使用情况反馈,因为可能因为联网问题造成反馈时报错
vi /etc/grafana/grafana.ini

#################################### Server ####################################
[server]
# Protocol (http, https, h2, socket)
;protocol = http

# The ip address to bind to, empty will bind to all interfaces
;http_addr =

# The http port  to use
http_port = 3001

#################################### Analytics ####################################
[analytics]
# Server reporting, sends usage counters to stats.grafana.org every 24 hours.
# No ip addresses are being tracked, only simple counters to track
# running instances, dashboard and error counts. It is very helpful to us.
# Change this option to false to disable reporting.
reporting_enabled = false
7、重启Grafana服务
systemctl restart grafana-server
systemctl status grafana-server
8、配置tengine
vi /sas/tengine/conf/conf.d/grafana.conf

upstream grafana {
    server 10.255.200.1:3001;
    server 10.255.200.2:3001;
    server 10.255.200.3:3001;

    session_sticky;
}

server {
    listen 3000 ssl backlog=32768;
    server_name grafana.hbrtv.org;
    ssl_certificate   /sas/tengine/sslkey/devops.crt;
    ssl_certificate_key  /sas/tengine/sslkey/devops.key;
    ssl_session_timeout 5m;
    ssl_ciphers ECDHE-RSA-AES128-GCM-SHA256:ECDHE:ECDH:AES:HIGH:!NULL:!aNULL:!MD5:!ADH:!RC4;
    ssl_protocols TLSv1 TLSv1.1 TLSv1.2;
    ssl_prefer_server_ciphers on;

    location / {
        proxy_pass http://grafana;
        proxy_set_header X-Real-IP $remote_addr;
        proxy_set_header Host $host;
        proxy_set_header X-Forwarded-For $proxy_add_x_forwarded_for;
    }
}
9、配置防火墙
firewall-cmd --zone=public --add-port=3000/tcp --permanent
# 如果配置错误,可使用以下格式删相应端口
# firewall-cmd --zone=public --remove-port=3000/tcp --permanent

firewall-cmd --permanent --add-rich-rule="rule family="ipv4" source address="10.255.200.1/30" port protocol="tcp" port="3001" accept"
# 如果配置错误,可使用以下格式删相应端口
# firewall-cmd --permanent --remove-rich-rule="rule family="ipv4" source address="10.255.200.1/30" port protocol="tcp" port="3001" accept"

# 重新载入防火墙配置,使配置生效
firewall-cmd --reload
10、重启nginx服务
systemctl restart tengine
systemctl status tengine
安装Promethus
官方参考文档:https://prometheus.io/docs/prometheus/latest/getting_started/
1、防火墙配置
firewall-cmd --zone=public --add-port=9090/tcp --permanent

firewall-cmd --reload
2、下载prometheus
mkdir /ssd/prometheus/

mkdir /sas/prometheus/
cd /sas/prometheus/

wget https://github.com/prometheus/prometheus/releases/download/v2.22.2/prometheus-2.22.2.linux-amd64.tar.gz

tar -xvfz prometheus-2.22.2.linux-amd64.tar.gz
mv prometheus-2.22.2.linux-amd64 prometheus
cd prometheus
3、修改prometheus,监控自身
vi /sas/prometheus/prometheus/prometheus.yml

# my global config
global:
  scrape_interval:     15s # Set the scrape interval to every 15 seconds. Default is every 1 minute.
  evaluation_interval: 15s # Evaluate rules every 15 seconds. The default is every 1 minute.
  # scrape_timeout is set to the global default (10s).

  # Attach these labels to any time series or alerts when communicating with
  # external systems (federation, remote storage, Alertmanager).
  external_labels:
    monitor: 'devops-monitor01'

# Alertmanager configuration
alerting:
  alertmanagers:
  - static_configs:
    - targets:
      # - alertmanager:9093

# Load rules once and periodically evaluate them according to the global 'evaluation_interval'.
rule_files:
  # - "first_rules.yml"
  # - "second_rules.yml"

# A scrape configuration containing exactly one endpoint to scrape:
# Here it's Prometheus itself.
scrape_configs:
  # The job name is added as a label `job=<job_name>` to any timeseries scraped from this config.
  - job_name: 'prometheus'

    # metrics_path defaults to '/metrics'
    # scheme defaults to 'http'.

    # Override the global default and scrape targets from this job every 5 seconds.
    scrape_interval: 5s

    static_configs:
    - targets: ['10.255.200.1:9090','10.255.200.2:9090','10.255.200.3:9090']
4、编写Systemd服务管理配置文件
vi /usr/lib/systemd/system/prometheus.service

[Unit]
Description=Prometheus Services
After=network.target remote-fs.target

[Service]
Type=simple
ExecStart=/sas/prometheus/prometheus/prometheus --config.file=/sas/prometheus/prometheus/prometheus.yml --storage.tsdb.path=/ssd/prometheus/
Restart=on-failure
RestartSec=5

[Install]
WantedBy=multi-user.target
5、启动prometheus服务
systemctl daemon-reload

systemctl start prometheus
systemctl status prometheus
systemctl enable prometheus
6、查看监控数据
浏览器访问:http://10.255.200.1:9090/targets 。可看到3个节点都正常上线,状态为:UP。

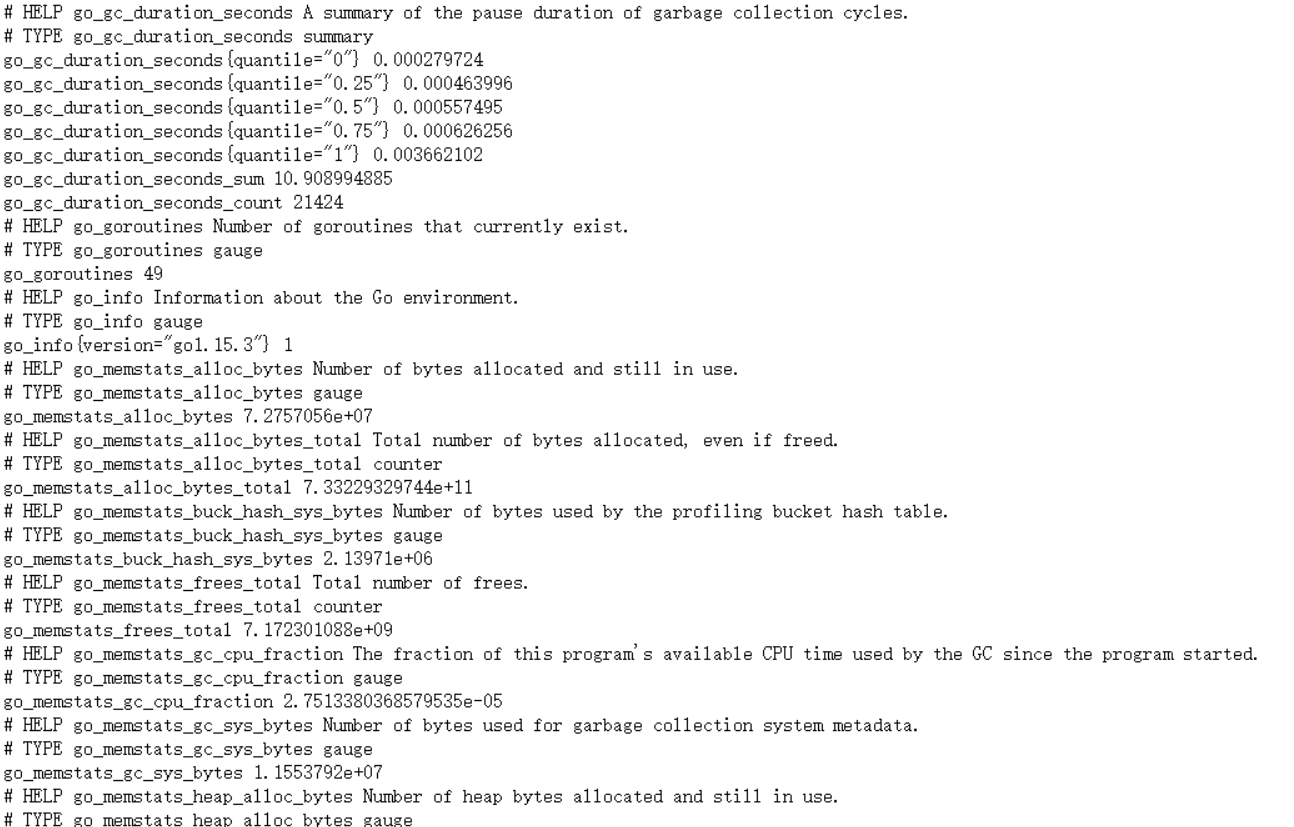
浏览器访问:http://10.255.200.1:9090/metrics 。可看到相应的监控数据。
7、在grafana中添加prometheus数据源
使用浏览器打开:https://10.255.200.5:3000 , 在 “Configuration” -> “Data Sources” 中添加prometheus数据源。时序数据库类型(Time series databases)选 “Prometheus”,选中后填写相应的名称及URL,点测试并保存即可。
安装node_exporter
1、防火墙配置
firewall-cmd --permanent --add-rich-rule="rule family="ipv4" source address="10.255.200.1/30" port protocol="tcp" port="9100" accept"

# 重新载入防火墙配置,使配置生效
firewall-cmd --reload
2、下载node_exporter
最新版下载链接:https://github.com/prometheus/node_exporter/releasescd /sas/prometheus/
wget https://github.com/prometheus/node_exporter/releases/download/v1.0.1/node_exporter-1.0.1.linux-amd64.tar.gz
tar -xzvf node_exporter-1.0.1.linux-amd64.tar.gz
mv node_exporter-1.0.1.linux-amd64 node_exporter3、编写Systemd服务管理配置文件
vi /usr/lib/systemd/system/node_exporter.service

[Unit]
Description=Prometheus Node Exporter Services
After=network.target remote-fs.target

[Service]
Type=simple
ExecStart=/sas/prometheus/node_exporter/node_exporter
Restart=on-failure
RestartSec=5

[Install]
WantedBy=multi-user.target
启动node_exporter可以指定如下参数, 过滤对应的磁盘挂载点
--collector.filesystem.ignored-mount-points=^/(dev|proc|sys|mnt/.+|var/lib/docker/.+)($|/) --collector.filesystem.ignored-fs-types=^(autofs|binfmt_misc|cgroup|configfs|debugfs|devpts|devtmpfs|fusectl|hugetlbfs|mqueue|overlay|proc|procfs|pstore|rpc_pipefs|securityfs|sysfs|tracefs)$
4、启动node_exporter服务
systemctl daemon-reload

systemctl start node_exporter
systemctl status node_exporter
systemctl enable node_exporter
5、配置prometheus采集node_exporter监控数据
vi /sas/prometheus/prometheus/prometheus.yml

# scrape_configs下添中新的监控任务
scrape_configs:

  ......

  - job_name: 'node_exporter'
    scrape_interval: 5s
    static_configs:
    - targets: ['10.255.200.1:9100','10.255.200.2:9100','10.255.200.3:9100']

# 重新启动prometheus服务
systemctl restart prometheus
systemctl status prometheus
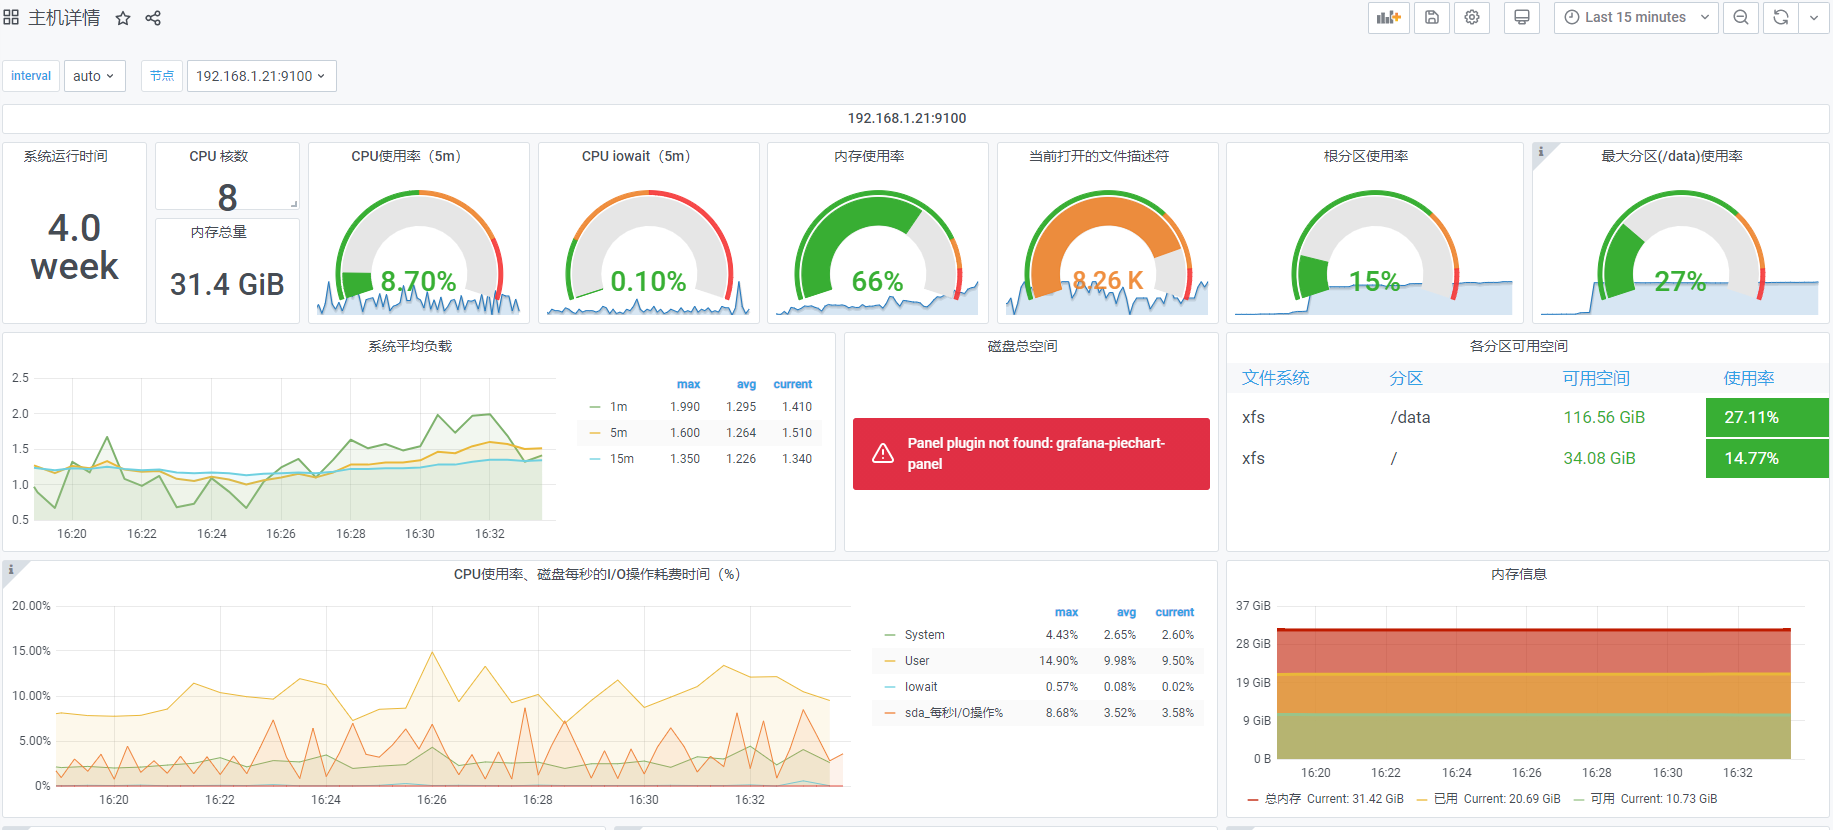
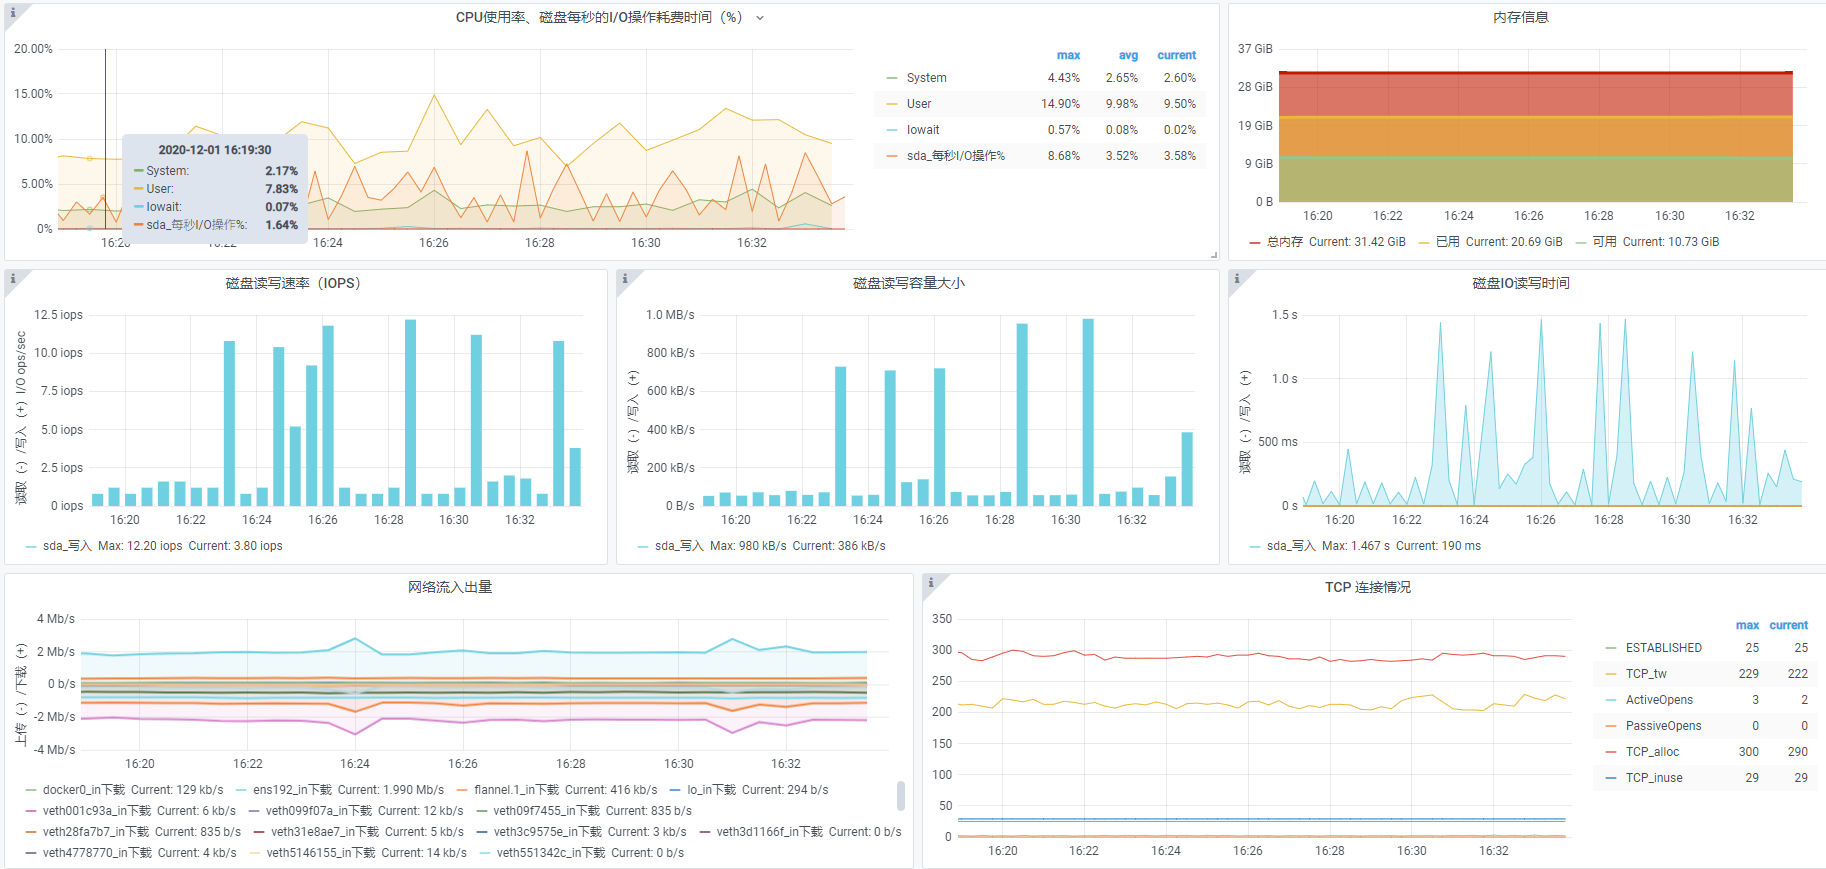
6、在grafana中配置监控信息展示模版
使用浏览器打开:https://10.255.200.5:3000 , 在 “DashBoards” -> “Manage” 中导入node_exporter展示模版,相关的模版可以从“https://grafana.com/grafana/dashboards” 搜索选用,此次选用ID为8919的中文node_exporter展示模版,从“https://grafana.com/grafana/dashboards/8919” 下载JSON文件,然后导入。或者服务器可以联网的情况下,在导入界面输入模版ID,从grafana服务器直接载入(Load)。或者是将模版具体的JSON文件内容复制粘贴到对应的配置文本框中载入。